- Nested
- 190mm BUILD PA12 TOP Mechanical
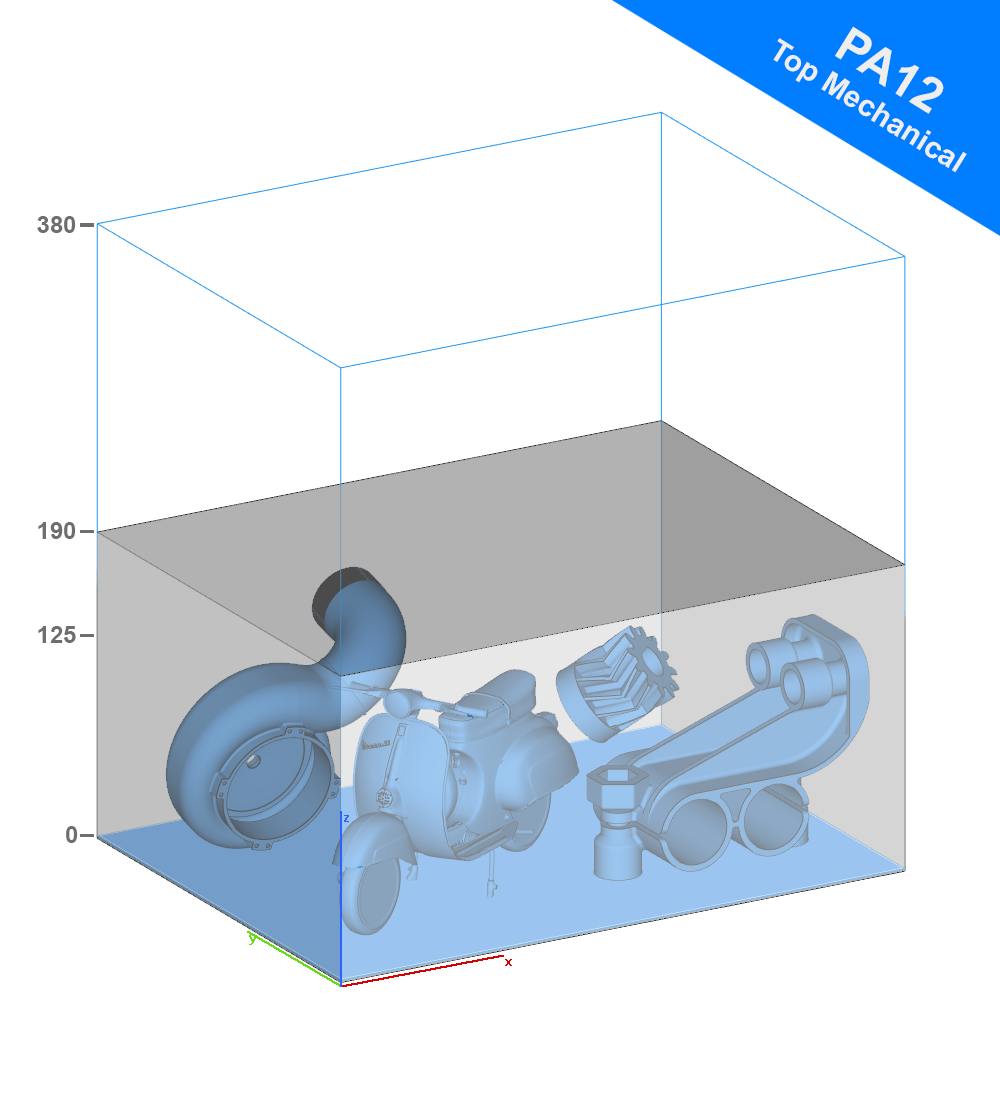
190mm BUILD PA12 TOP Mechanical
.
18 February 2026 Shipping
Guidelines for the creation of a NesteD Build
The price is fixed and does not vary according to the number of objects it contains, that's why the more objects you can place inside the Nested Build,
optimizing their position on the X Y Z axis, the less they will cost.
-
Organise your NesteD Build in the best possible way, preferably using automated softwares (e.g. Materialise Magics or Autodesk Netfabb).
-
You can upload to wetransfer, dropbox, google drive or other file transfer services
-
Choose the number of copies of the same build you want and add them to your shopping cart.
-
Forward the link via the appropriate "NesteD Build links" section.
Please remember that the print volume is X 380mm - Y 284mm - Z 190mm, we recommend a max Density less than 13%
Your articles printed with MJF technology and contained inside the NesteD Build
will have the best quality, tolerance, aesthetics and repeatability if you follow these simple steps we recommend.
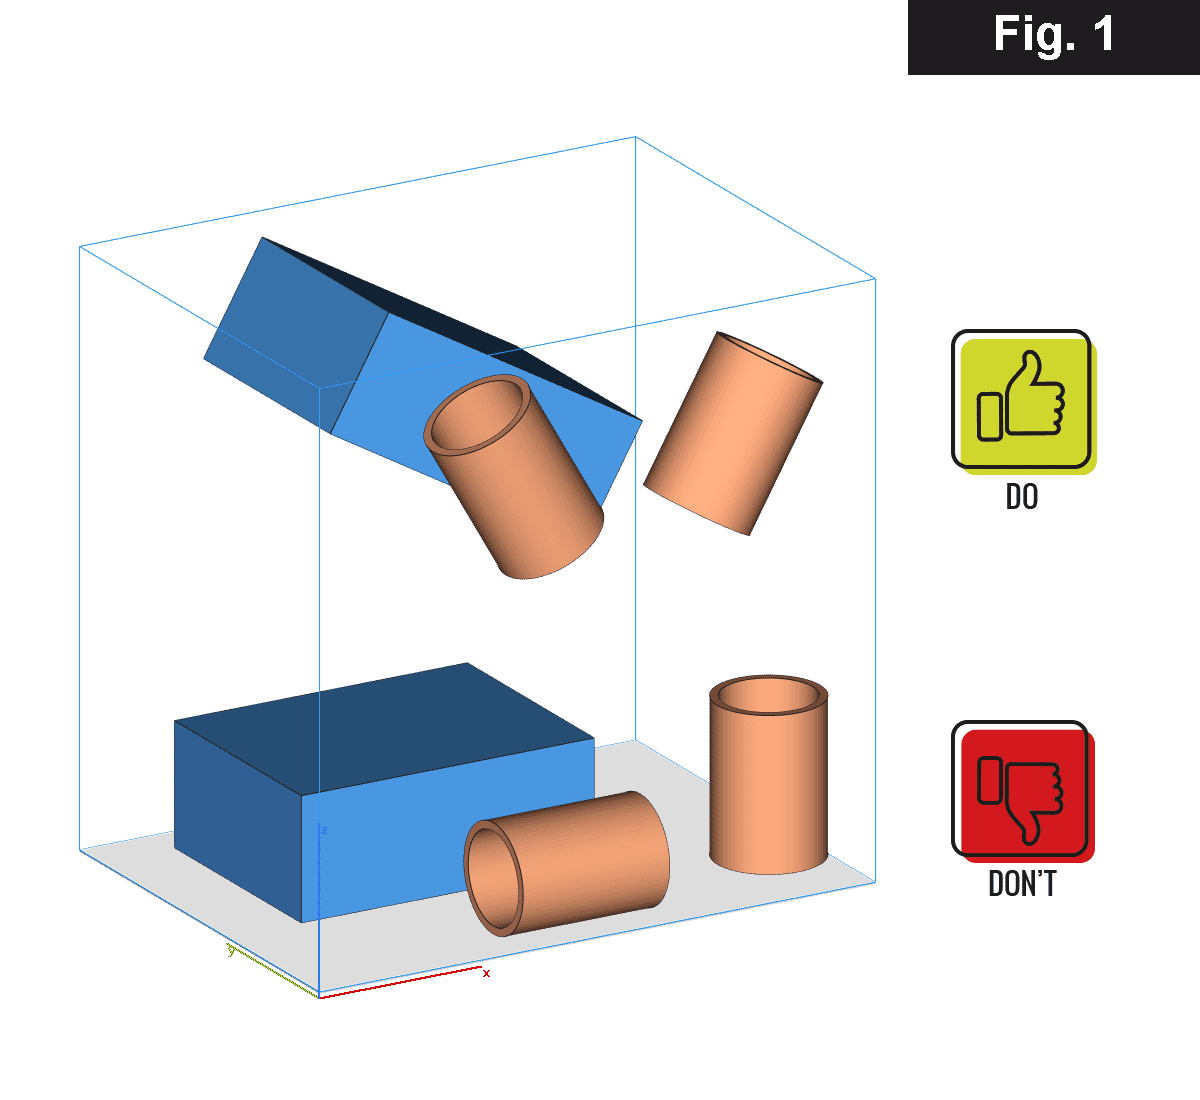
1. Objects orientation in relation to the xy-plane (Fig.1)
-
A correct orientation increases the aesthetic quality of objects and in some cases it also increases their dimensional accuracy.
-
Following the guidelines suggested by the manufacturer HP, combined with our on-field experience, we recommend (where possible) to tilt the objects by 25° in X and/or by 25° in Y to achieve a better tolerance and surface finish.
-
To limit the ovality of cylindrical objects, we recommend to place them as suggested in Fig.1.
-
One side of your object will always have a nicer finish than the others. This side is oriented downwards when printing.
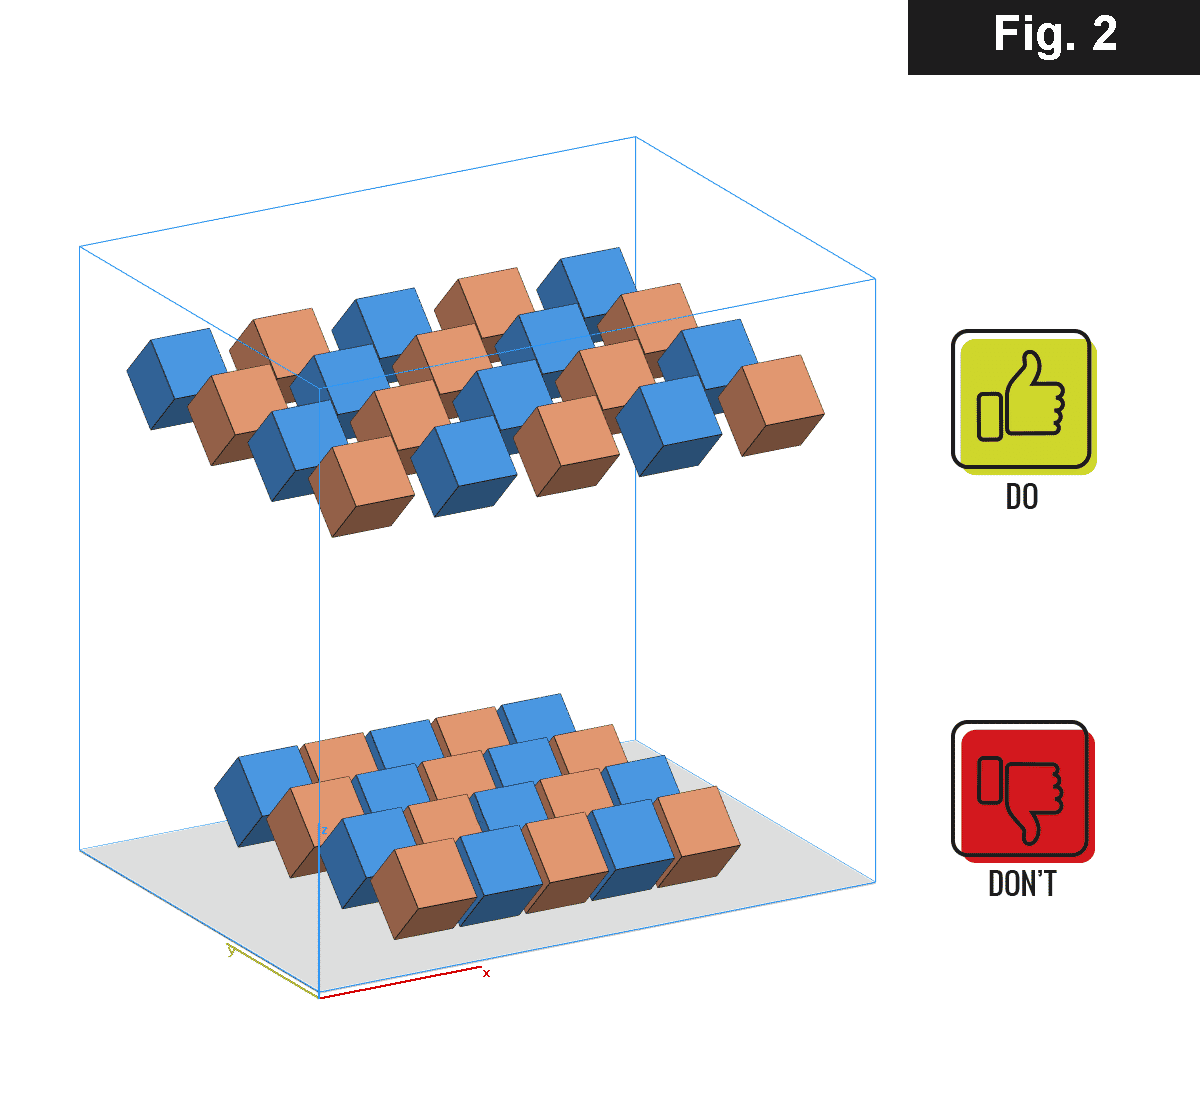
2. Distancing objects (Fig.2)
-
Parts larger than 100cm³ must be spaced at least 10mm apart
-
Parts smaller than 100cm³ should be spaced at least 4mm apart
-
Objects with a volume greater than 20% of their bounding box must be spaced at least 10mm apart.
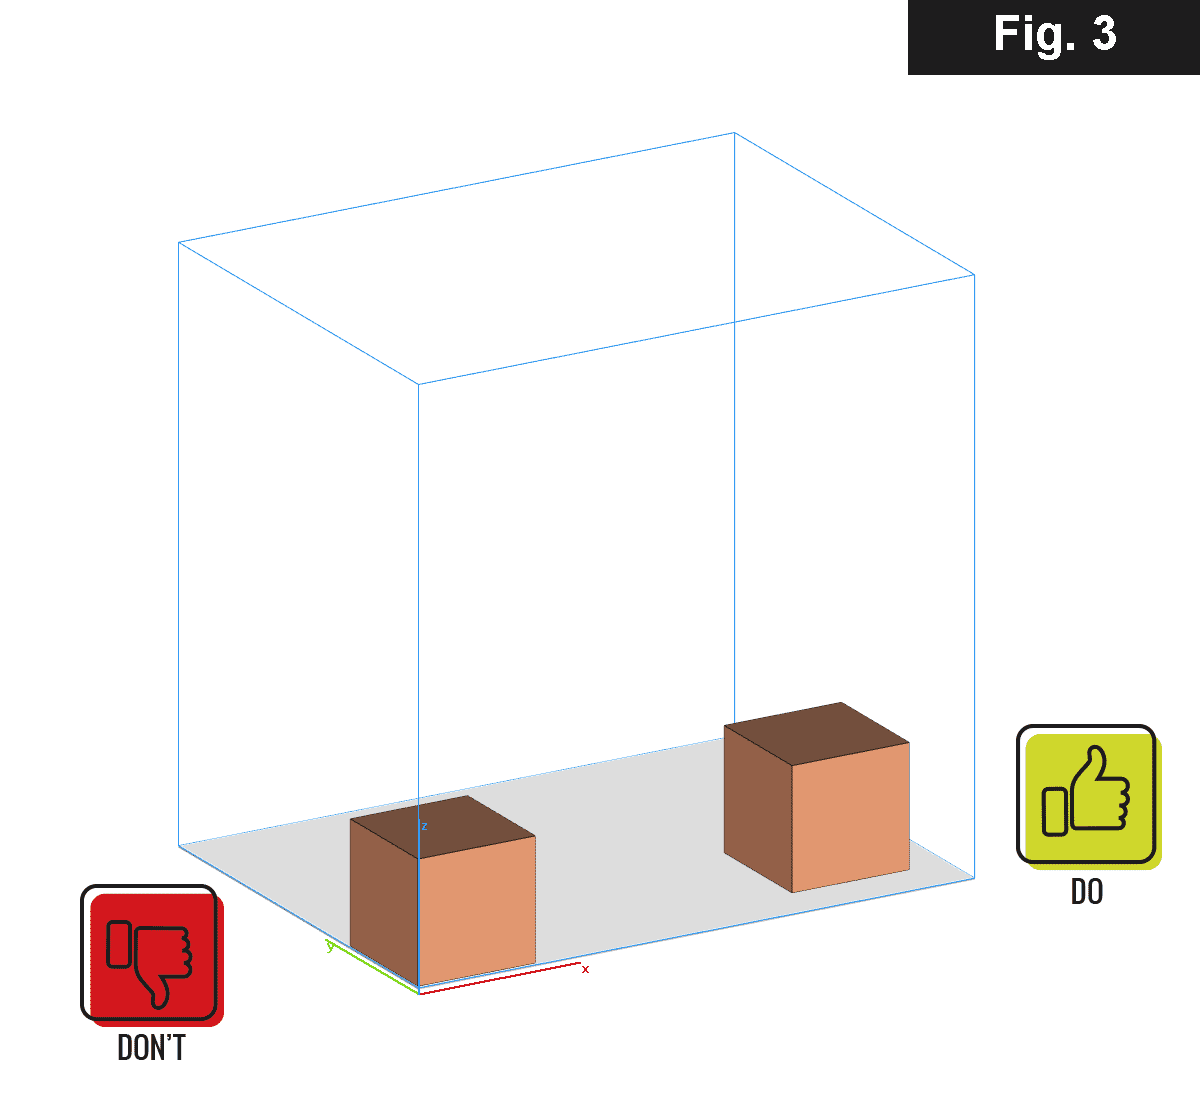
3. XY-Plane Margins (Fig.3)
-
All parts must be distanced at least 5 mm from the outer edges of the printing plate. Please remember that the actual XY- dimensions of the printing plate are 370x274mm.
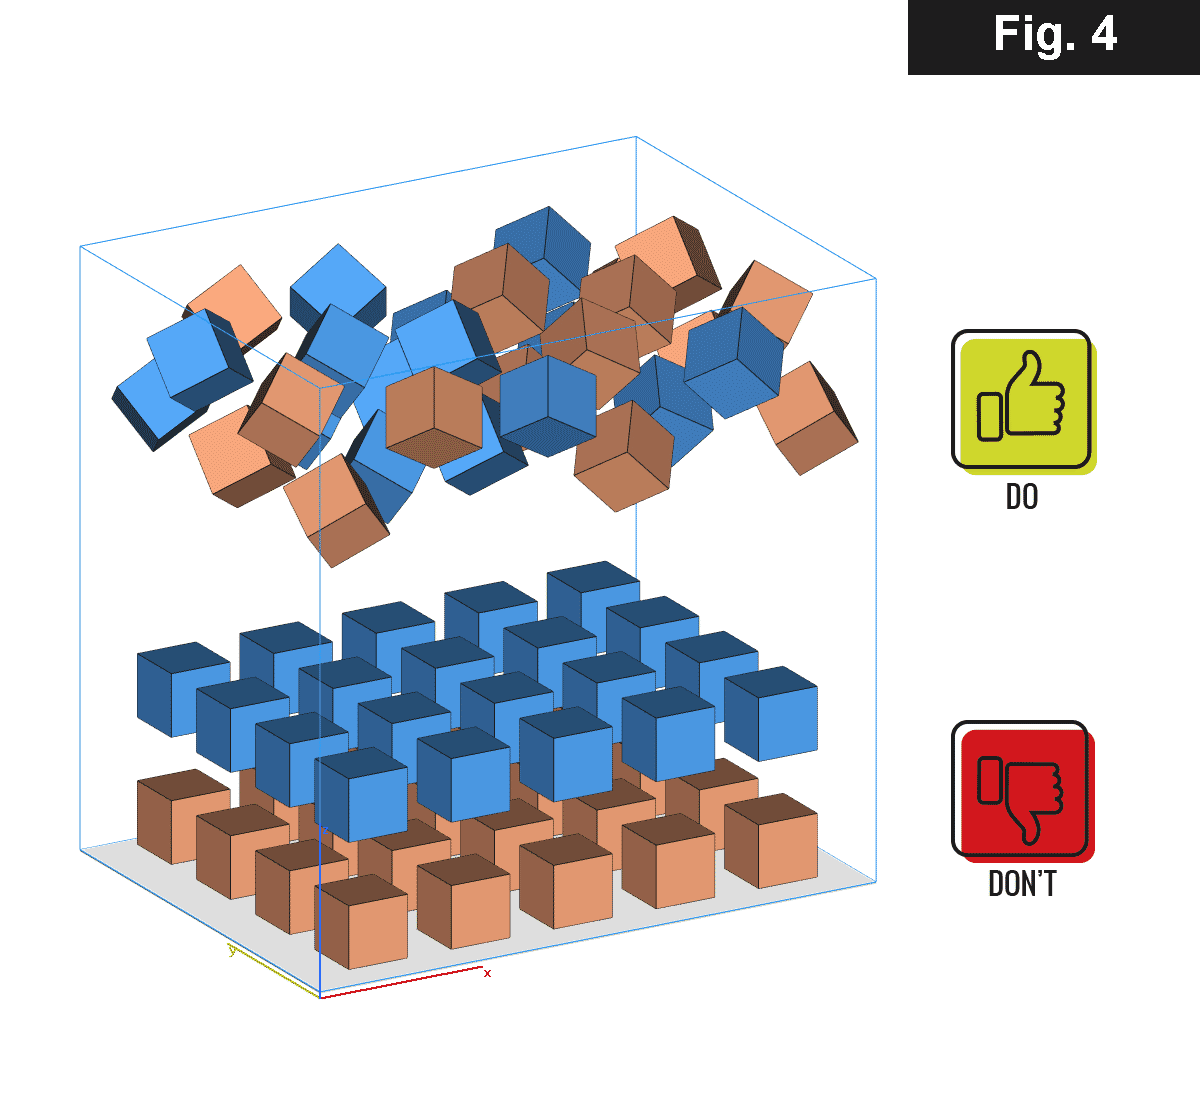
4. Uneven distribution of objects (Fig.4)
-
Distribute the objects so that the printing areas of their Z-slices are as homogeneous as possible. This facilitates heat absorption over the entire surface and avoids critical areas. For the same amount of radiation, printed areas with smaller sections receive much more energy than areas with higher density. This situation could generate objects within the same build with different characteristics, mechanical tolerances and aesthetics.
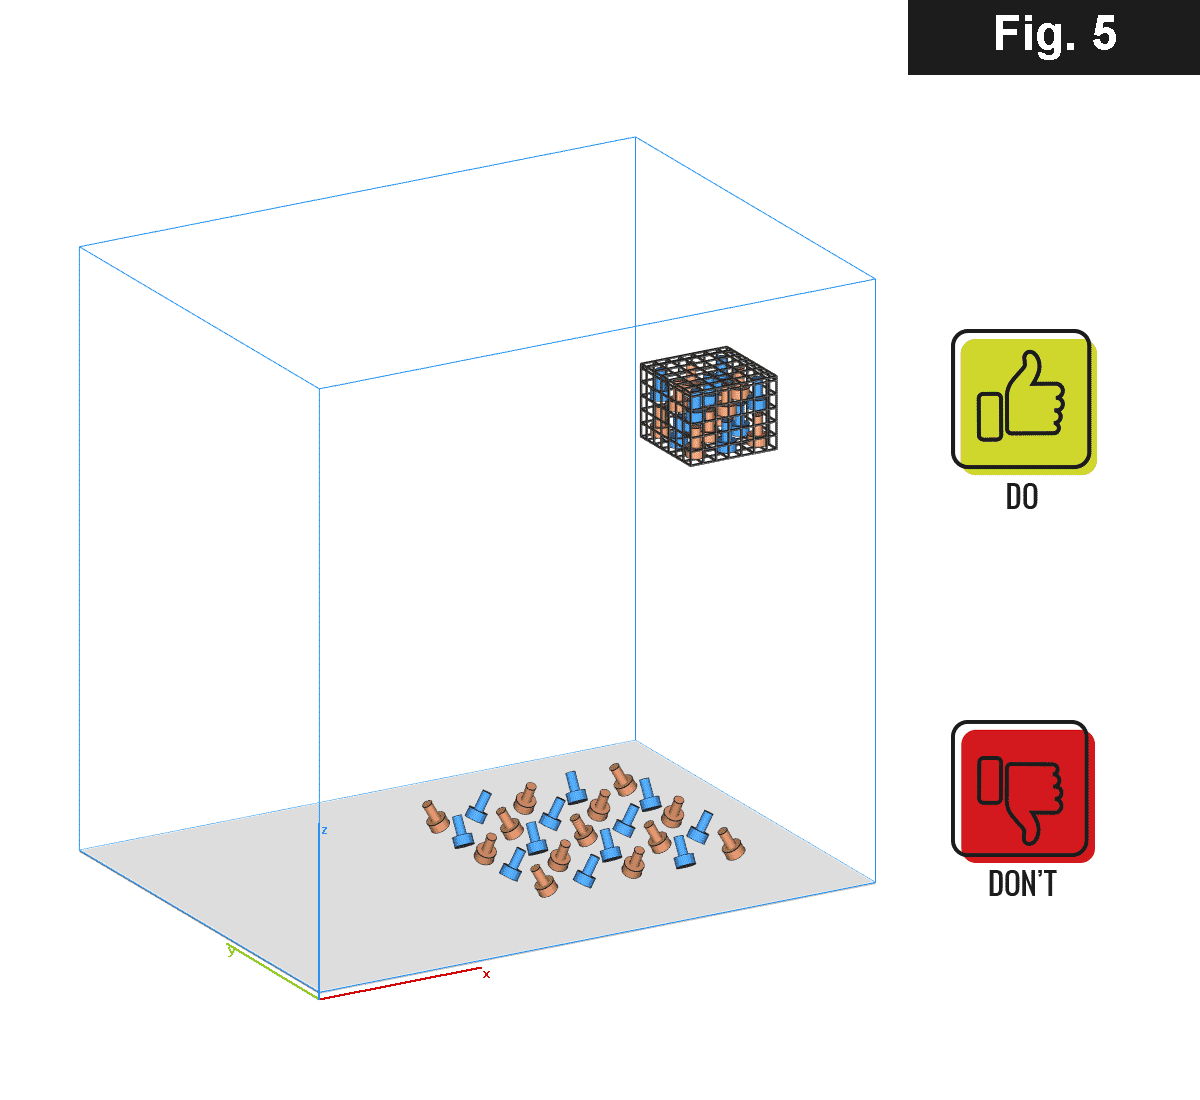
5. Containment of small objects using Sinterboxes (Fig.5)
-
All objects smaller than 1cm³ or with two or more sides of less than 10 mm should be enclosed in cages. The mesh size of the cages should be large enough to contain the objects so that they are not lost or mislaid during subsequent cleaning, blasting and staining.
