Hello Engineers!
This is the first of a Video Series dedicated to the Multi Jet Fusion Technology of Professional 3D Printing.
For you, whether you are an Online 3D Printer or an Industrial 3D Printer, in this article we will look at the different parts of MJF 3D Printing, starting with the design of the Build, i.e. the design of the print volume filled with nylon powder, in which the printer fuses and creates the Parts.
#1 Designing the Build with Multi Jet Fusion 3D Printing
By design we mean all the things that allow you to quickly and correctly organise and prototype your parts in an MJF 3D printing build:
- arrangement of objects in the 3D printing volume;
- deformation of flat surfaces;
- thermal bleed;
- dimensions of the Build.
Arrangements of the different Components in the total 3D Printing volume
As mentioned before, the design of the build is the arrangement of the different components in the total print volume, so one of the first things to take into account is the distance between one object and another.
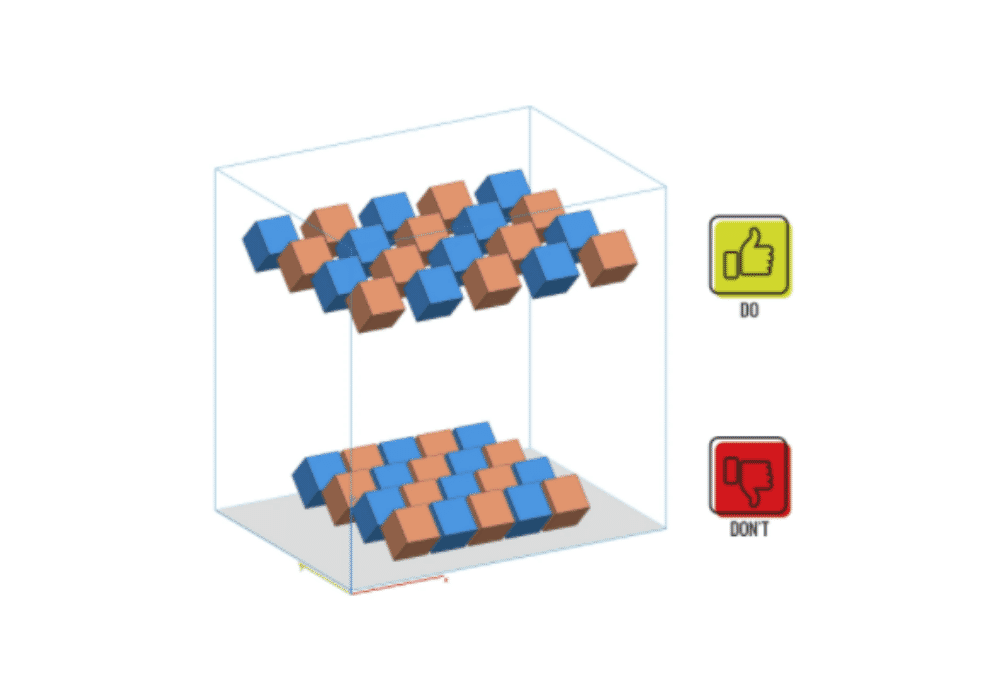
The free spaces between Parts and Prototypes are filled with powder. If there is not enough space, the energy produced by the MJF printer's lamps can melt the surrounding nylon powder. It is therefore necessary to maintain a distance of at least 2 mm between the various Components, to avoid melting the Prototype Objects together when printing.
Deformation of the Flat Surfaces of 3D Printed Parts
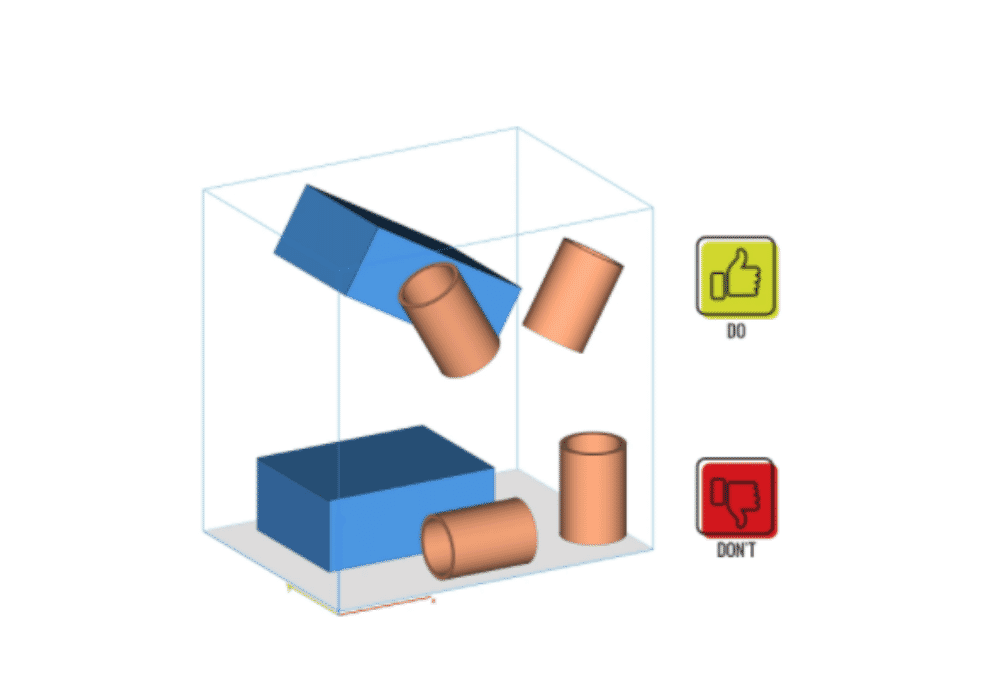
Another aspect that you should evaluate when building the Build is the deformation of flat surfaces. This is an effect intrinsic to powder bed technologies, which relies on the powder itself melting to consolidate objects layer by layer. When an area is melted, it behaves like a fluid; for example, water in a glass tends to rise along the edges in a convex fashion. In reality, molten nylon acts in reverse and generates more of a concavity. Larger areas, parallel to the X and Y axes, are more prone to this surface capillarity, i.e. deformation.
To compensate for this effect it would be better to tilt the Pieces by about 25 degrees, on the X and Y axes, as in figure 1. Pieces with tilts greater than 25 degrees may also produce "stair stepping" effects. In other words, if you take a 2D print file, a classic graphic, and rotate it by more than 25 degrees, the surface will appear slightly stair-stripped.
Thermal Bleed Effect of MJF 3D Printing
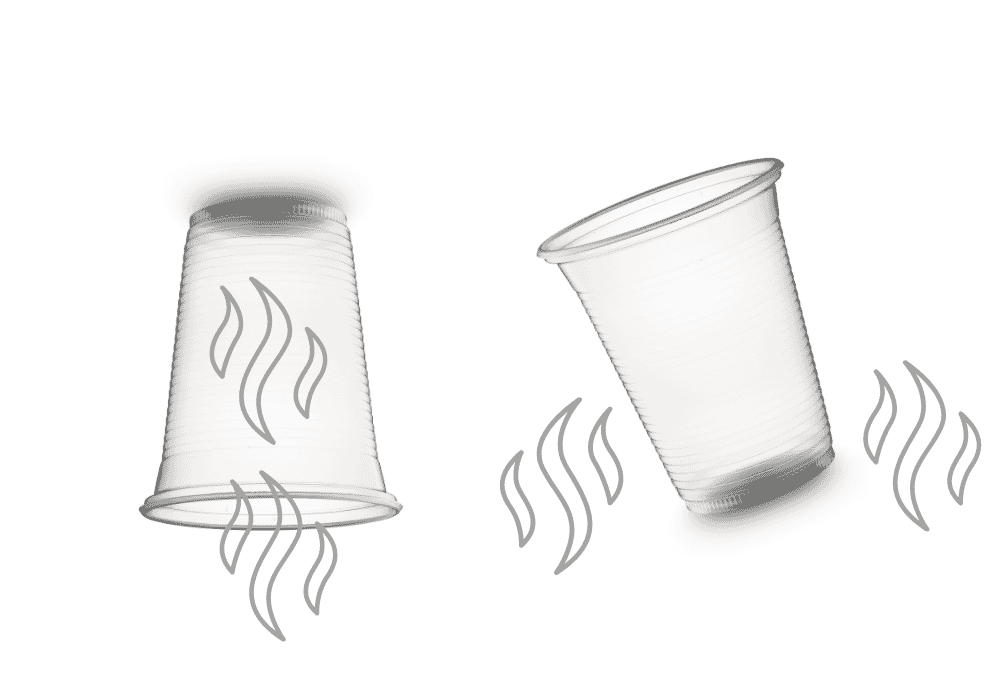
Thermal Bleed occurs because the Multi Jet Fusion printer uses energy from lamps in its printing process. It may happen that the dust close to the surface of the printed Objects also merges with the Parts or Prototypes. You can notice this clearly after cleaning, because in this case there will be accumulations of lighter melted dust around the Objects.
This phenomenon is more pronounced in Parts that have hollow areas.
Take for example 2 plastic cups (A and B) the bottom (in this case top) of cup A will be more prone to Thermal Bleed, because it will receive all residual heat generated by the printing of the layers below. The bottom of cup B will not run this risk, as the heat will be dispersed upwards without any obstacles.
Dimensions of the Build
What are the optimal dimensions of the Build? What can you print? How many pieces can you fit inside the Build?
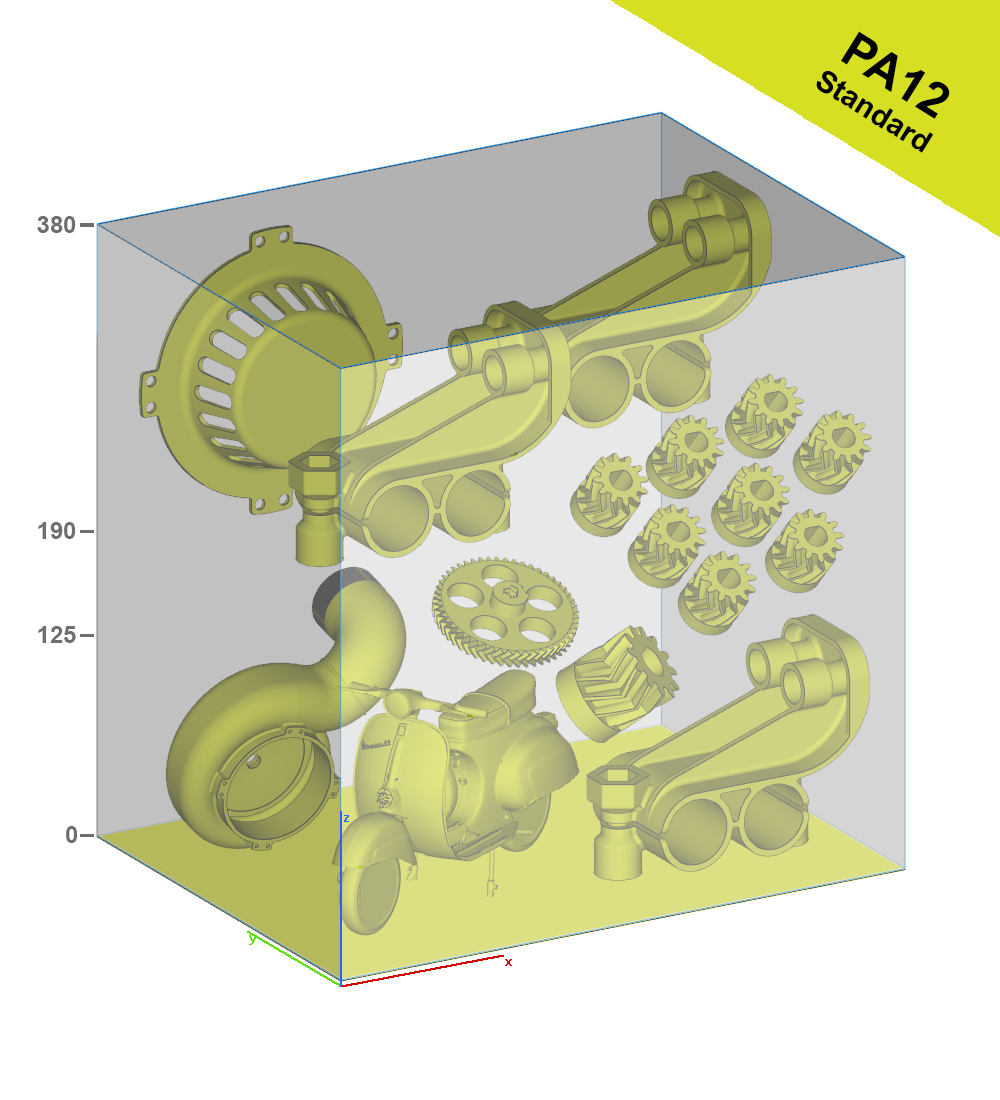
The Build has a maximum volume that originates from the following dimensions: base 380 x 284 mm and variable height on the Z axis of 380 mm.
Conclusions
We have seen how the design of the build concerns the organisation of the print volume, which, filled with nylon powder, allows the printer to melt the powder and create the Parts, following the design described in the stl file.
We have analysed the individual parts and are ready, in the next episode, to tell you about the actual 3D printing.
For more information and to discover all the advantages of the Nested Build, read our blog article.
In the meantime, if you feel like printing your own Parts or Prototypes, get your Instant Online Quote and enjoy 3D Printing!


